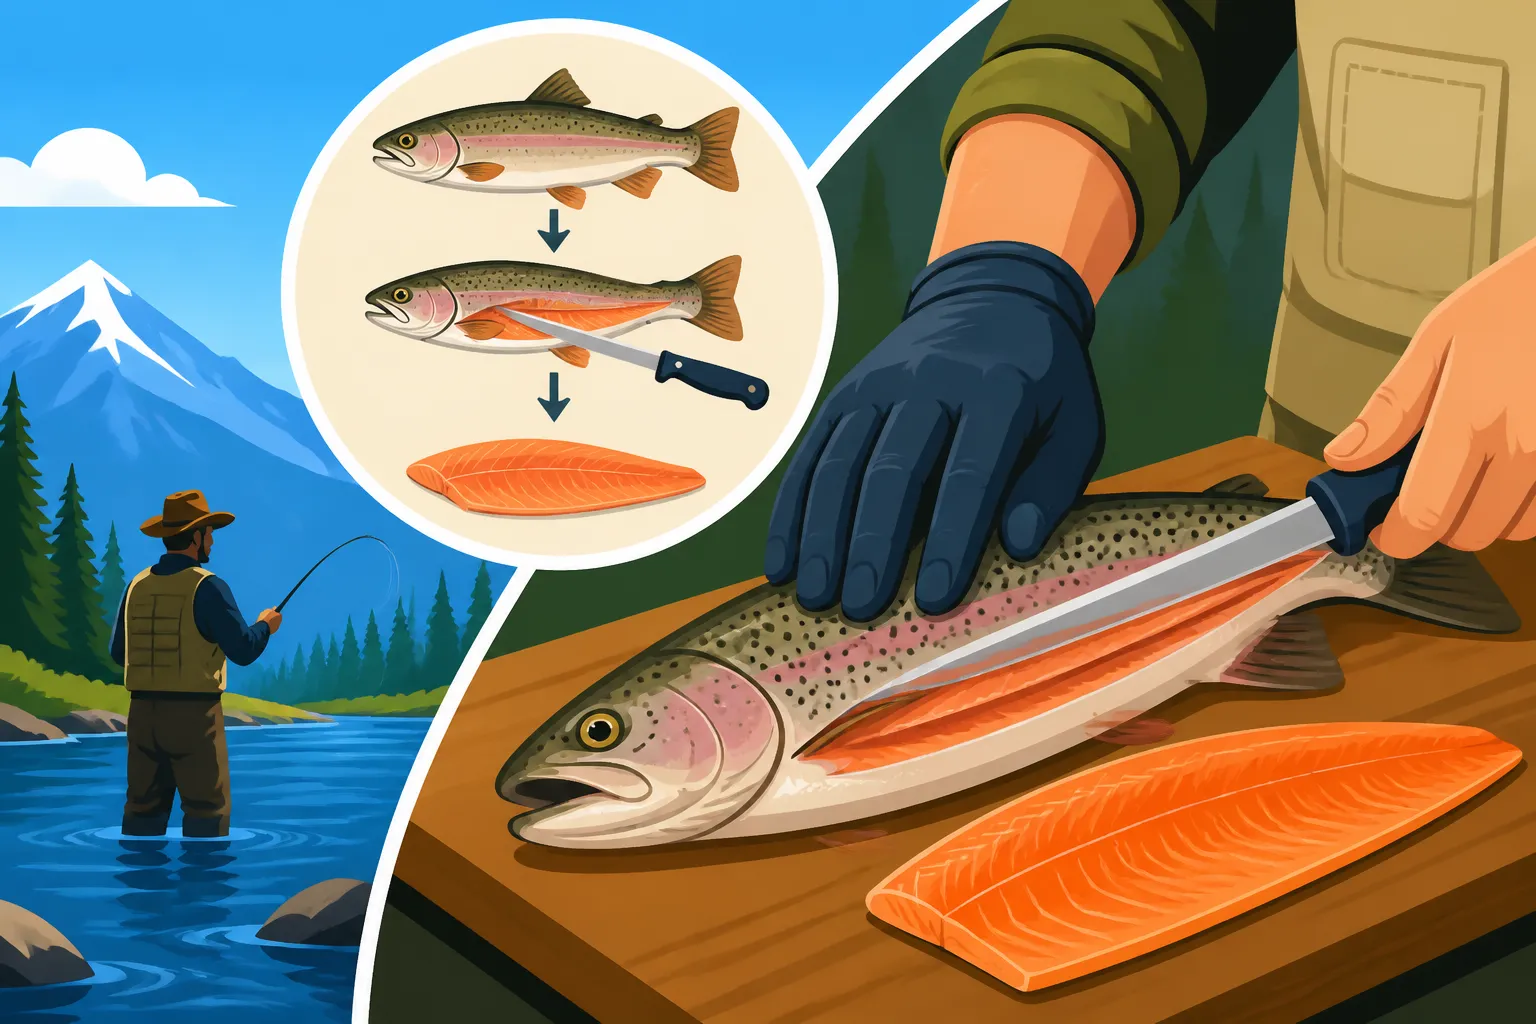
How to Fillet a Trout for the First Time
Alright, fellow anglers, let's talk about one of those skills that seems a little daunting at first, but is incredibly rewarding: filleting your own trout. You’ve put in the time, battled the elements, and finally landed that beautiful Wyoming trout, only to look at it and think, "Now what?" Don't worry, we've all been there, staring at a gorgeous fish and feeling a pang of hesitation about turning it into dinner. This guide is here to walk you through the process, making that first cut a little less intimidating and a lot more successful.
Getting Ready: The Essentials Before You Cut
Before you even think about making that first cut, it’s crucial to have your workspace set up and the right tools on hand. Trying to fillet a fish with a dull knife on a wobbly surface is a recipe for frustration, not delicious trout. Taking a few moments to prepare properly will make the entire process smoother, safer, and much more enjoyable. Think of it as mise en place for your fish!
Assembling Your Filleting Kit
You don't need a professional chef's kitchen to fillet a trout, but having the right basic tools makes a world of difference. The most important tool, by far, is a sharp knife. I can't stress this enough – a dull knife is more dangerous than a sharp one because you have to apply more pressure, increasing the chance of slipping. For those just starting out, a good quality filleting knife is an investment that will pay dividends for years to come. You can find excellent options on Amazon, from flexible blades perfect for delicate trout to stiffer ones for larger species.
Beyond the knife, you'll want a sturdy cutting board that won't slide around. Many anglers prefer plastic or composite boards for fish because they're easy to clean and sanitize. A damp cloth or paper towel placed underneath your cutting board can prevent it from slipping during those crucial cuts. Don't forget a bowl or container for the fillets and another for the scraps, making cleanup a breeze. And, of course, plenty of paper towels or a clean rag are invaluable for keeping your hands and workspace tidy throughout the process. When thinking about What to Bring for a Family Fishing Day, a dedicated filleting knife often gets overlooked, but it's a game-changer if you plan on keeping your catch.
Preparing Your Workspace and Your Catch
Once you have your tools, it's time to prepare your actual workspace. Whether you're in your kitchen, on a picnic table at the campground, or even just a clean tailgate, ensure it's well-lit and easy to clean. Lay out your cutting board, have your knife within easy reach, and set up your bowls. Having a running water source nearby is a huge plus for rinsing your knife and hands as you go.
Now, let's talk about your fish. Ideally, you want to fillet a fish that has been properly bled and kept cold. Bleeding the fish immediately after catching helps to improve the taste and appearance of the fillets by removing blood from the muscle tissue. If you didn't bleed it, don't sweat it too much for your first time, but it's a good practice to adopt. Ensure the fish is thoroughly chilled, but not frozen solid. A cold fish is firmer and much easier to handle, providing less resistance as you make your cuts. If you're keeping multiple fish, remember to abide by the Wyoming Trout Stream Daily Limit for the waters you're fishing.
The Step-by-Step Filleting Process
This is where the rubber meets the road! Taking a whole fish and transforming it into beautiful, boneless fillets can feel like surgery, but with a good knife and a little patience, you'll be amazed at what you can accomplish. We’re aiming for efficiency and minimal waste, but remember, your first few attempts might not be perfect, and that's totally okay. Every cut is a learning experience.
The First Major Cuts: Getting to the Backbone
Lay your trout flat on your cutting board. For most people, it's easiest to start with the side that's facing up. Take your sharp filleting knife and make an initial cut directly behind the gill plate, angling slightly towards the head until you feel the backbone. Don’t cut through the backbone yet; just go deep enough to hit it. This cut should extend from the top of the fish down to the belly.
Next, rotate your knife so the blade is flat against the backbone, pointing towards the tail. Start making shallow cuts along the backbone, slowly working your way down the fish. You'll feel the ribs as you go. The goal here is to separate the fillet from the bones while keeping as much meat as possible. Use a sawing motion if needed, but smooth, continuous strokes are best. As you get more experienced, you'll be able to make longer, more confident cuts. Don't be afraid to lift the fillet gently with your free hand to guide your knife. This process will take practice, and you'll likely leave some meat on the bones initially, but that's part of the learning curve!
Separating the Fillet and Rib Bones
Once you've worked your knife down to the tail, you should have one side of the fillet mostly detached, still connected at the belly and skin. Now, you have a choice: you can either finish separating the fillet from the skin and then deal with the rib bones, or tackle the rib bones first. For a beginner, I often recommend removing the fillet from the fish first, then dealing with the ribs on your cutting board.
To remove the fillet from the skin: hold the tail end of the fillet firmly, skin-side down, against the board. Insert your knife blade between the meat and the skin at the tail end, keeping the blade almost parallel to the board. Apply gentle downward pressure to the skin and use a slight sawing motion with your knife to separate the meat from the skin, working your way towards the wider part of the fillet. Keep your knife blade angled slightly downwards towards the skin, so you're leaving as little meat as possible on the hide.
Now you have a skinless fillet, but it still has those pesky rib bones. Lay the fillet flat, skin-side down if you still have it, or presentation side up if you removed it. You’ll see the curve of the rib bones. Take your knife and carefully cut along the line of the ribs, removing them as a single strip. Try to angle your knife to follow the bone structure, minimizing meat loss. You can also use a pair of fish pliers or needle-nose pliers to pull out individual pin bones if you prefer, but cutting them out as a strip is generally faster for trout. Repeat the entire process for the other side of the fish.
Here’s a simple table to help visualize the steps:
| Step No. | Action | Key Detail |
|---|---|---|
| 1 | Prepare Workspace | Clean, stable cutting board; sharp filleting knife. |
| 2 | Prepare Fish | Bled and chilled trout, laying flat. |
| 3 | Initial Cut (Behind Gills) | Cut behind gill plate, angled to head, down to backbone. |
| 4 | Cut Along Backbone | Keep knife flat against backbone, working towards tail, detaching meat. |
| 5 | Remove Skin (Optional first) | Hold tail, slide knife between meat & skin, parallel to board. |
| 6 | Remove Rib Bones | Lay fillet flat, cut along rib cage to remove bones in a strip. |
| 7 | Repeat | Flip fish over, repeat steps 3-6 for the second fillet. |
| 8 | Inspect and Trim | Check for stray bones, dark spots, or unwanted belly fat. |
Troubleshooting Common Filleting Challenges
Let's be real, your first attempt at filleting a trout might not look like it came out of a cooking magazine. That's perfectly normal! Everyone faces a few bumps along the road when learning a new skill, especially one that requires precision and a feel for the anatomy of a fish. The key is to not get discouraged and to learn from each cut. You’re becoming a more self-sufficient angler, and that’s something to be proud of.
Dealing with "Meat Left on the Bone" Syndrome
Ah, the classic beginner’s dilemma: looking at the carcass and realizing there's still a good bit of meat clinging to the backbone or ribs. It happens to the best of us! When I first started, I used to feel so wasteful. The main culprits are usually not keeping the knife blade flat against the bones or not using a long enough stroke. Remember, the bones are your guide. Your knife should "feel" its way along them.
If you find you're leaving too much meat, don't throw that carcass away! Those leftover bits are absolutely perfect for making fish stock, which can then be used in soups, stews, or risottos. It’s a fantastic way to minimize waste and add flavor to your cooking. Another trick is to hold the fish head up with one hand while you cut downwards along the backbone with the other, letting gravity help pull the fillet away. Sometimes, investing in a slightly more flexible filleting knife, like those you can find on Amazon, can also help you hug those curves better and get more meat. It gives you that little extra give to follow the contours of the fish.
Overcoming Slippery Situations and Uneven Cuts
A fresh fish can be incredibly slippery, making it hard to maintain control, which in turn leads to uneven cuts or even accidents. The first rule here is safety: if your hands are getting too slick, rinse them off and wipe them dry. Using a paper towel or a clean rag to hold the fish firmly can provide crucial grip. Some anglers even wear filleting gloves, which can offer extra traction and protection.
Uneven cuts often stem from a lack of confidence or inconsistent pressure. Try to visualize the path your knife needs to take before you make the cut. Short, tentative cuts tend to be more jagged. Practice making longer, smoother strokes. Remember that the goal is to get two clean fillets, not to perfectly replicate a factory-cut piece of fish. With each fish you fillet, you'll develop a better "feel" for the process, and your cuts will become more consistent. This isn't just about fish, it's about developing fine motor skills and patience, much like learning How to Set the Hook on a Trout Without Losing It.
Pin Bone Frustrations
Even after removing the rib cage, trout often have a line of tiny, almost translucent pin bones running down the middle of the fillet. These can be a real pain if not removed. Some fish processing methods involve cutting a "V" shape along the pin bone line to remove them entirely, but this does sacrifice a little bit of meat.
For trout, I generally recommend using a good pair of clean needle-nose pliers or specialized fish tweezers. You can feel for these bones by running your finger along the fillet. Grab the end of each bone firmly and pull it straight out, following the natural angle of the bone. This minimizes tearing of the delicate flesh. It's a bit tedious, but it ensures a boneless, enjoyable eating experience. It's often easier to do this after the fillet is off the skin, as the skin can sometimes hold the bones in place too firmly. Consider this a crucial step, especially if you plan on serving your trout to guests who might not appreciate a surprise bone!
After the Fillet: Cleaning, Storing, and Enjoying Your Catch
You’ve done it! You’ve successfully filleted your first trout (or perhaps your tenth, and it’s finally looking good!). Now that you have those pristine fillets, the next steps are all about preserving their freshness and preparing them for a delicious meal. This part is just as important as the filleting itself, ensuring that all your hard work on the water and at the cutting board truly pays off.
Post-Fillet Cleaning and Preparation
Once your fillets are off the fish and any pin bones are removed, give them a quick rinse under cold water. This helps remove any lingering scales, blood, or small bone fragments. Pat them thoroughly dry with paper towels. Excess moisture can degrade the quality of the fish, especially if you plan to freeze it. Drying also helps seasoning adhere better if you’re cooking them immediately. Inspect each fillet for any dark spots, stray bits of membrane, or tough belly fat that you might want to trim off. Use your sharp knife to make these final, precise adjustments.
For immediate cooking, your fillets are ready for seasoning and the pan, grill, or oven! There's nothing quite like the taste of fresh-caught fish cooked simply. If you're looking for inspiration, our guide on How to Cook Fresh-Caught Trout Over a Campfire has some fantastic ideas that bring out the natural flavors of your hard-earned meal.
Proper Storage for Freshness
Whether you're planning to eat your trout tonight or save it for later, proper storage is paramount. For fillets you'll cook within a day or two, place them in an airtight container or wrap them tightly in plastic wrap, then store them on ice or in the coldest part of your refrigerator.
For longer storage, freezing is your best friend. The trick to good frozen fish is to prevent freezer burn, which happens when air comes into contact with the fish. Vacuum sealers are fantastic for this, but if you don't have one, tightly wrap each fillet individually in plastic wrap, then wrap again in aluminum foil or freezer paper. For an extra layer of protection, you can even place these wrapped fillets into a freezer-safe bag. Another old-school method for preserving fish in the freezer is the "ice glaze." Place the fillets on a pan in the freezer until firm, then dip each one quickly in cold water to create a thin layer of ice, and repeat a few times. This ice acts as a protective barrier against air. Properly prepared, frozen trout can last for several months. You can find excellent vacuum seal bags and freezer-safe containers on Amazon.
The Ultimate Reward: Enjoying Your Catch
There’s a unique satisfaction that comes from catching your own fish, cleaning and filleting it yourself, and then preparing it for a meal. It connects you directly to the food on your plate and the wild places you visited. Remember that fishing is also about conservation, so always be mindful of Possession Limits vs Daily Limits in Wyoming and only keep what you're legally allowed and what you'll actually consume.
Whether you lightly pan-fry them with butter and lemon, grill them over an open flame, or bake them with herbs, your freshly filleted trout will undoubtedly be one of the Best-Tasting Fish to Keep From Wyoming Waters. Share your meal with friends and family, recount the story of the catch, and savor the flavors. This whole process, from the first cast to the last bite, is what makes fishing in Wyoming such a fulfilling experience.
Disclaimer
This article is for general informational purposes only and does not constitute professional advice. Laws, prices and regulations vary by location and change over time. Consult a qualified professional for guidance on your specific situation.