How to Tie a Woolly Bugger for Wyoming Rivers
Oh, the sheer joy – and sometimes, the utter frustration – of choosing that perfect fly for Wyoming's incredibly diverse waters! You've got everything from raging, cold tailwaters to serene, gin-clear mountain lakes, and figuring out one pattern that can truly hold its own across all these scenarios often feels like a never-ending quest. That's why we're diving deep today into one of the most beloved, versatile, and downright effective flies ever created: the Woolly Bugger. This guide isn't just about tying a fly; it's about crafting a true workhorse that will consistently put fish in your net on any Wyoming river, stream, or lake.
Why the Woolly Bugger is a Wyoming River Workhorse
Let's be honest, few flies inspire as much confidence as a well-tied Woolly Bugger. It’s not just a fly; it’s a whole category of flies, capable of imitating so many different food sources that it often feels like cheating. On Wyoming's dynamic waterways, where conditions can change faster than the weather, having a reliable pattern that fish instinctively strike at is an absolute game-changer. This isn't just a basic streamer; it’s a living, breathing imitation that has tricked countless trout, bass, and even other species across the Cowboy State.
Versatility Across Species and Conditions
Think about it: what does a minnow look like darting through the water? What about a leeches undulating movement? Or a crawfish scuttling along the bottom? Even large stonefly nymphs or aquatic worms could be mistaken for a Woolly Bugger in motion. This incredible ambiguity is precisely its strength. It's not trying to be one specific thing, but rather a general representation of several appealing protein-packed snacks that fish just can't resist.
This versatility means you can confidently cast a Woolly Bugger into the fast, deep runs of the North Platte River, stripping it with authority to entice aggressive brown trout. Or, you can slowly crawl a smaller, unweighted version through the quieter pools of a high-country stream for a native cutthroat trout. It performs beautifully in clear water, where its subtle movement and lifelike profile can be irresistible, and it shines in murky or off-color water, where its larger size and silhouette make it easily detectable. For those looking to target a variety of species, from hard-fighting rainbow trout to the opportunistic smallmouth bass in some of our larger reservoirs, the Woolly Bugger is almost always a solid choice. It's a fundamental pattern every angler fishing Wyoming should have in their box.
Key Components and Their Function
A Woolly Bugger might look simple, but each of its primary components plays a crucial role in its effectiveness. Understanding these parts will not only help you tie a better fly but also understand why it works so well.
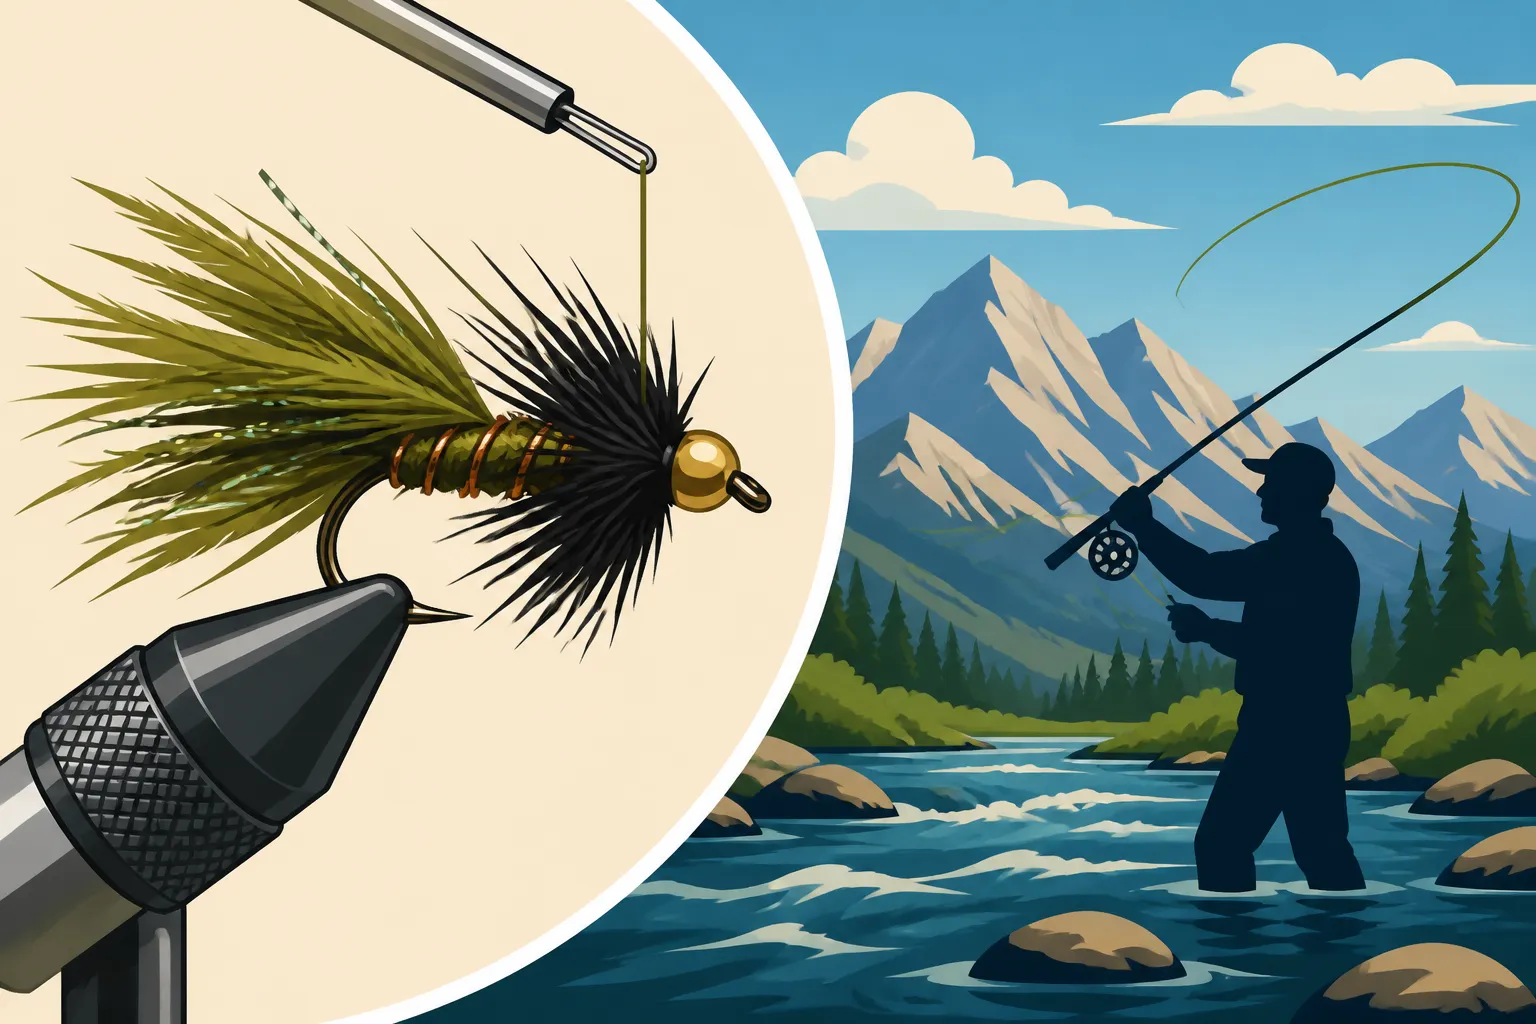
- The Tail (Marabou): This is the heart of the Woolly Bugger's lifelike action. Made from soft, flowing marabou feathers, the tail pulsates and breathes in the water with even the slightest retrieve or current. This is what mimics the undulating movement of a leech, the swimming motion of a minnow, or the twitching antennae of a large nymph. The length and thickness of the marabou tail dictate how much action the fly has and how quickly it sinks.
- The Body (Chenille): The body provides bulk, color, and profile. Typically made from chenille, it gives the fly its primary shape and allows for a wide range of color combinations. The texture of the chenille can also trap air bubbles, adding to the fly's underwater allure. Some tiers opt for materials like dubbing for a buggier look, but chenille is the classic choice for its durability and ease of use.
- The Hackle (Palmar-Wrapped): This is where the "woolly" part comes from. The hackle, usually a soft saddle or hen hackle, is wrapped spirally (palmered) along the entire length of the body, from the tail to just behind the head. These fibers move freely in the water, creating a buggy, pulsating effect that suggests legs, gills, or other appendages. This movement adds to the fly's overall profile and visual appeal, especially on the retrieve, making it look like it's actively swimming or crawling.
- Weighting (Lead Wire, Beadhead, or Conehead): While not always present, weighting is often a critical component for getting the fly down to where the fish are. Lead or tungsten wire wrapped around the hook shank under the body, or a beadhead (metal bead at the eye of the hook) or conehead (cone-shaped metal weight) added before tying, all serve to sink the fly. This allows you to fish deeper runs, fast currents, or target fish feeding on the bottom, which is often crucial when nymphing or fishing deeper pools on rivers or lakes. The choice of weighting depends heavily on where and how you plan to fish it, from the swift flows of the Snake River to the depths of Flaming Gorge Reservoir.
Essential Materials for Tying the Perfect Wyoming Woolly Bugger
So, you're ready to start churning out these fish-catching machines? Fantastic! Like any craft, having the right materials and tools makes all the difference, not just in the final product but in the enjoyment of the tying process itself. Don't feel overwhelmed; a basic setup can get you started, and you can always expand your arsenal as you get more hooked (pun intended!) on fly tying.
Hooks, Beads, and Weighting Options
The foundation of any good fly is the hook, and for Woolly Buggers, you want something robust and sharp.
- Hooks: For most Wyoming river applications, hooks ranging from #4 to #10 are standard. If you're chasing bigger browns or lake trout, you might go as large as a #2 or #1. Conversely, for smaller stream trout or intricate presentations, a #12 might be appropriate. Look for streamer hooks with a slightly longer shank and often a heavy wire. Brands like Daiichi, Gamakatsu, and Tiemco make excellent streamer hooks. Always ensure your hooks are chemically sharpened for better penetration. Remember, some sensitive waters, especially on popular trout streams like certain sections of the North Platte River, require barbless hooks, so you might consider purchasing barbless hooks or pinching the barbs on standard hooks before you start tying.
- Beads and Coneheads: These metal additions not only add weight but also a visually appealing "head" to your fly.
- Beadheads: Typically round, made of brass or tungsten. Tungsten is denser, so a smaller tungsten bead weighs more and sinks faster, which can be a huge advantage in strong currents. Sizes are matched to your hook size (e.g., 5/32" or 4.0mm for a #8 hook).
- Coneheads: Offer a more streamlined, aggressive profile that cuts through the water, ideal for fast-sinking flies or mimicking baitfish heads. They also come in various sizes and materials.
- Colors can vary too: gold, silver, black nickel, and even fluorescent colors can add an extra trigger.
- Lead or Tungsten Wire: For flies that need to get deep without a visible beadhead, or for adding extra weight to beadhead flies, wrapping lead or tungsten wire around the hook shank is the way to go. Lead wire is traditional, but tungsten wire is becoming more popular due to environmental concerns and its superior density. You'll want different gauges (sizes) for different hook sizes; a .020" or .025" wire is common for #6-#10 hooks.
Marabou, Chenille, and Hackle Choices
These are the soft, colorful elements that give your Woolly Bugger its life and appeal.
- Marabou: This is the magic. Choose good quality marabou, often called "blood quill" marabou, for its fine tips and incredible softness.
- Colors: Black, olive, and brown are absolute must-haves for Wyoming fishing. These imitate leeches, sculpins, and other forage incredibly well. White, gray, and tan are excellent for baitfish imitations, especially in clearer lakes or reservoirs. You can also experiment with vibrant colors like purple or red for specific conditions or "attractor" patterns. Many anglers find it economical to buy bulk marabou packs on Amazon or from specialty fly-tying suppliers.
- Chenille: This forms the body. Standard chenille is fine, but you can also find "bugger chenille" which has slightly longer fibers for a more robust body.
- Colors: Match your marabou! Black, olive, brown, and white are standards. Flashier chenille with integrated Mylar strands can add an irresistible sparkle, often effective for targeting kokanee salmon or aggressive trout.
- Hackle: Soft, webby hackle is key for the palmered body.
- Types: Saddle hackle or hen hackle are preferred. Rooster neck hackle is usually too stiff for a good "breathing" effect.
- Colors: Grizzly hackle (barred black and white) is classic and adds a natural, mottled look. Solid colors like black, olive, or brown are also essential. Badger hackle (cream with a black center) creates a striking contrast that can be very effective.
Consider grabbing a few spools of Krystal Flash or Flashabou in colors like pearl, black, or copper. A few strands tied in with the marabou tail can add that extra bit of "bling" that grabs a fish's attention, especially in lakes where baitfish flash is a common trigger.
Tools of the Trade
You don't need a massive, expensive setup to start tying Woolly Buggers, but a few essential tools will make the process much smoother and more enjoyable.
- Vise: This is paramount. It holds the hook securely, leaving your hands free to manipulate materials. Even an entry-level vise will work to get started. Look for one that holds hooks firmly and rotates smoothly.
- Bobbin: This ingenious tool holds your tying thread and dispenses it evenly. A ceramic-tipped bobbin is worth the small extra cost as it prevents thread fraying.
- Scissors: You'll want a sharp pair of fine-tipped scissors for precise cuts of thread and materials. Keep a separate, slightly heavier pair for cutting wire or flash.
- Whip Finisher: This tool creates a neat, durable knot to finish off your fly's head. It might seem tricky at first, but with a little practice, it's indispensable.
- Bodkin: A simple, needle-like tool used for applying head cement, picking out fibers, or untangling errant threads.
- Hackel Pliers: Small pliers with rubber-coated jaws designed to grip hackle feathers without tearing them, making palmering much easier.
- Head Cement or UV Resin: A small drop of head cement on your finished knot ensures it won't unravel. UV resin, cured with a UV light, offers a fast-drying, durable, and glossy finish if you want to get a little fancier. For basic kits, you can find a comprehensive set of beginner fly tying tools on Amazon that includes most of these essentials.
Step-by-Step Guide to Tying a Classic Woolly Bugger
Alright, let's get down to business! Tying a Woolly Bugger is a fantastic way to hone your basic fly tying skills because it incorporates several fundamental techniques. We're going to tie a classic beadhead olive Woolly Bugger, which is a killer pattern on pretty much any Wyoming river you'll encounter.
Preparing the Hook and Adding Weight
This initial setup is crucial for ensuring your fly sinks correctly and maintains its structural integrity.
- Secure the Hook: Place your chosen hook (let's say a #8 streamer hook) firmly in your vise, ensuring it's snug and won't wobble.
- Add the Beadhead (Optional but Recommended): If you're using a beadhead, slide it onto the hook shank point first until it rests against the eye. For many Woolly Buggers, a 5/32" or 4.0mm tungsten bead in gold or black nickel works perfectly for a #8 hook.
- Wrap Lead or Tungsten Wire: Take your lead or tungsten wire (e.g., .020") and start wrapping it around the hook shank, just behind the bead and stopping about a quarter to a third of the way down the shank. Make sure the wraps are tight and even. You'll want about 10-15 wraps, depending on how much weight you desire. Snip off the excess wire, leaving a small gap at the bend of the hook. This creates a balanced sink rate and a good foundation for the body.
- Start the Thread: Attach your tying thread (e.g., 6/0 or 140 denier in black or olive) directly behind the weighted section. Make a few wraps to secure the thread, then bind down the wire with tight, overlapping thread wraps. This prevents the wire from spinning on the hook shank. Bring your thread back to a point just above the hook barb – this is where the tail will start.
Attaching the Tail and Flash
The tail is the primary movement generator for your Woolly Bugger, so pay attention to proportion and flow.
- Select Marabou: Take a small bunch of olive marabou feathers from the stem. You want enough to create a good profile but not so much that it becomes bulky. The length should be roughly the same length as the hook shank itself, or slightly longer. Strip off any overly stiff fibers at the base.
- Tie in the Marabou: Hold the marabou over the top of the hook shank at your tying-in point. Make one loose wrap of thread, then pull down to secure it. Make a few more tight wraps to firmly attach the marabou, wrapping forward slightly over the butt ends to create a smooth transition. Trim the excess marabou butt ends at an angle to reduce bulk.
- Add Flash (Optional): Take 2-4 strands of Krystal Flash or Flashabou in a complementary color (e.g., pearl or copper). Fold them in half and tie them in on top of the marabou tail, extending just slightly beyond the marabou. This adds a subtle shimmer that can really grab attention, especially for Rainbow Trout Fishing in Wyoming.
Building the Body and Wrapping Hackle
This is where your fly starts to take on its iconic "woolly" appearance.
- Tie in the Chenille: Take your olive chenille and strip back a small section of the fluffy fibers from one end, exposing the core thread. Tie in this core thread securely just in front of where you tied in the marabou and flash. Wrap your tying thread forward to just behind the beadhead, then let it hang.
- Prepare the Hackle: Select a suitable olive or grizzly saddle/hen hackle feather. The fibers should extend back to about the hook point when held against the hook shank. Strip off the fluffy fibers at the base of the feather to expose the quill. Tie in the tip of the hackle securely at the same point where you tied in the chenille, making sure the "shiny" (outside) side of the feather is facing the hook bend.
- Wrap the Chenille Body: Now, carefully wrap the chenille forward, making tight, even, slightly overlapping wraps. Stop wrapping just behind the beadhead, leaving a small space for the hackle and the head. Secure the chenille with a few tight thread wraps, then trim the excess.
- Palmer the Hackle: With your hackle pliers, grasp the butt end of the hackle feather. Gently wrap the hackle forward in even spirals over the chenille body. As you wrap, stroke the hackle fibers back with your free hand to ensure they lay correctly and don't get trapped. Each wrap should be spaced about the width of the chenille body, creating a dense, buggy appearance. Stop wrapping just behind the beadhead. Secure the hackle with several tight thread wraps, then carefully snip off the excess hackle feather.
Finishing the Fly
A good finish ensures durability and a clean look.
- Form the Head: Use your tying thread to build a neat, small head behind the beadhead. Make sure all loose ends are trimmed cleanly and that no hackle fibers are trapped.
- Whip Finish: Now, grab your whip finisher. Perform a whip finish knot (typically 4-6 turns) to secure your thread. This creates a very strong and durable knot that won't easily unravel. If you're new to this, it takes a little practice, but it's well worth the effort.
- Apply Head Cement: Apply a small drop of head cement to the thread wraps on the head using your bodkin. This further secures the knot and adds durability. Allow it to dry thoroughly.
- Inspect: Give your newly tied Woolly Bugger a good once-over. Are all materials secure? Is the head neat? Does the tail flow nicely? If so, congratulations – you've just tied a Wyoming river workhorse!
Customizing Your Woolly Bugger for Wyoming's Diverse Waters
The beauty of the Woolly Bugger isn't just its base effectiveness, but how incredibly adaptable it is. You can tweak just about every aspect of it to match specific conditions, target particular species, or imitate unique forage found in Wyoming's vast aquatic environments. Think of the classic olive bugger as your starting point, and these customizations as your roadmap to specialized success.
Color Variations for Different Conditions
The color of your Woolly Bugger can significantly influence its effectiveness. Matching the local forage or standing out in tough conditions are both valid strategies.
- Black: An absolute classic. Black Woolly Buggers excel in low light conditions, deep water, or when fish are keying in on leeches or dark-colored nymphs. They create a strong silhouette that fish can easily see. This is often a go-to for Streamer Fishing for Wyoming Brown Trout in the fall.
- Olive: Your all-around utility player. Olive imitates sculpins, various large nymphs, and general aquatic bug life. It's often effective in almost any water type and light condition.
- Brown: Great for mimicking crawfish, especially in rivers with rocky bottoms, or darker colored baitfish. It also works well in slightly stained or off-color water.
- White/Gray/Tan: Excellent choices for imitating smaller baitfish like minnows or juvenile suckers. These colors really shine in clearer waters, particularly lakes and larger reservoirs where baitfish are abundant.
- Two-Tone Options: Don't be afraid to mix and match! An olive body with a black marabou tail, or a black body with a grizzly hackle, can add subtle contrast and trigger more strikes. Many anglers swear by patterns with a hint of purple or red, often tied with a black or olive body, as "attractor" patterns for aggressive trout.
Adjusting Weight for Depth and Current
Getting your fly into the strike zone is paramount, and weighting is your key tool.
- Heavier Beads/Wire: For deep pools, fast currents, or when fishing rivers like the North Platte River where you need to get down quickly, opt for tungsten beads and more lead/tungsten wire. This ensures your fly plummets to the bottom where larger trout often hold. This is particularly important if you're attempting to target fish during the colder months when they tend to hug the bottom.
- Lighter Beads/No Weight: For shallower riffles, slower currents, or when fishing near the surface, a lighter brass bead or even no weight at all might be more effective. This allows the fly to drift more naturally and remain in the shallower feeding lanes.
- Coneheads for Punching Water: Coneheads, with their more aerodynamic shape, are excellent for getting flies down through swift currents without tumbling as much. They're a great choice when Trolling Techniques for Wyoming Reservoirs are needed, or when fishing deep edges on rivers.
Enhancing Action with Materials
Small changes in material choices can make a big difference in how your Woolly Bugger behaves in the water.
- More Marabou for a Fuller Profile: If you want a bulkier, more vibrant tail, use a slightly larger bunch of marabou. This creates more resistance in the water, slowing its sink rate and giving it a more pronounced pulsing action on the retrieve.
- Softer Hackle for More Movement: The choice of hackle directly impacts the "breathing" effect. Softer hen saddle hackles will undulate and pulsate with even the slightest movement, whereas stiffer rooster hackles will provide less action but greater durability.
- Adding Rubber Legs: For an extra enticing "wiggle," consider tying in a few strands of fine rubber legs along the body. This mimics the frantic movement of crustaceans or struggling baitfish and can be particularly effective on larger, more aggressive trout. Many anglers swear by rubber-legged Woolly Buggers for enticing large Brown Trout Fishing in Wyoming.
Wyoming-Specific Considerations
Wyoming's unique regulations and diverse ecosystems call for some specialized thought when tying.
- Barbless Hook Requirements: It's absolutely crucial to be aware of sections of rivers, particularly popular fly-fishing destinations like portions of the North Platte, where Barbless Hook Requirements on the North Platte River are in effect. Always check the current Wyoming Fishing Regulations Every Angler Should Know before heading out. Tying on barbless hooks from the start saves you the hassle of pinching barbs later.
- Matching Local Forage: Take a moment to consider what the fish in your target water are eating. Are there many sculpins in that particular stretch of the Miracle Mile? Then an olive or black bugger might be best. Are crawfish prevalent in that reservoir? A brown or even orange bugger could be the ticket. Are the cutthroat in a high-alpine lake feeding on small minnows after ice-out? A white or gray bugger might perform exceptionally. Understanding the ecosystem will give you an edge.
- High-Altitude Lakes: When fishing Wyoming's serene, often crystal-clear high-alpine lakes, a smaller, less weighted Woolly Bugger, often in olive or black, can be incredibly effective when slowly stripped or even suspended under an indicator. The subtle movement is key here, as fish in these pristine waters can be quite spooky.
By mastering the basic Woolly Bugger and then experimenting with these customizations, you'll build a fly box capable of tackling nearly any situation Wyoming throws your way. This incredibly versatile pattern, when tied with thought and care, truly stands as one of the best Fly Fishing Techniques for Wyoming Trout Streams.
Here's a quick table outlining some common Woolly Bugger variations suited for Wyoming waters:
| Variation / Color | Primary Imitation | Best Water Type/Conditions | Key Features |
|---|---|---|---|
| Olive Beadhead | Sculpin, large nymph | All-around, slightly stained to clear water | Tungsten bead, medium weight |
| Black Beadhead | Leech, dark nymph | Low light, deep water, murky conditions | Tungsten bead, strong silhouette |
| Brown Weighted | Crawfish, bottom-dweller | Rocky bottoms, moderate current | Lead wire under body, less flash |
| White/Gray Beadhead | Minnow, baitfish | Clear lakes, reservoirs, aggressive trout | Flashy tail, tungsten bead, rapid sink |
| Grizzly Palmers | Sculpin, general nymph | All water types, classic attractor | Grizzly hackle for mottled look, medium weight |
| Rubber Legged | Crawfish, insect larvae | Slower currents, deeper pools, agitated fish | Extra action from rubber legs, moderate to heavy weight |
Disclaimer
The information provided in this guide is for general informational purposes only. Fishing regulations in Wyoming can change frequently. Always consult the most current Wyoming Game and Fish Department regulations booklet or website before you go fishing. It is your responsibility to know and follow all applicable laws and regulations.